
MacDraft 6.1 has caught up to big screens
Appletell • May 3, 2014 • Written By: Gary Coyne
The CAD program MacDraft celebrated its 25th anniversary last year, and has just released an updater that provides some excellent new features.
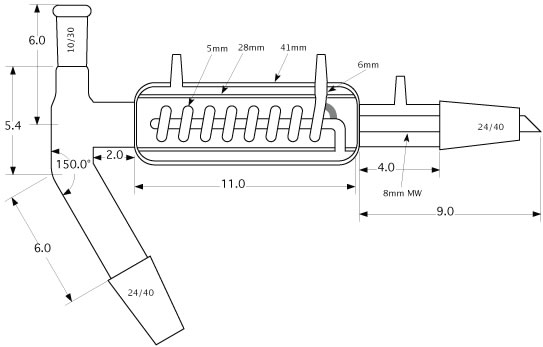
In the early days of the Mac, there was MacPaint, MacWrite, and MacDraw. The first was a bitmapped image program, the 2nd was a word-processing program, and the latter was a vector drawing program. The difference between the first and the last was that MacPaint was pixel based and the later was vector based. To fine-tune an image in MacPaint, you went into FatBit mode and turned on or off each pixel (this was long before there was anti-aliasing on the screen). MacDraw was vector based. As such, all objects on the page were re-sizable, reshape-able, and—the big thing—resolution independent. However, the issue with MacDraw is that it had a stupid ruler. That is, you could define a drawing to have 1" = 1' and that would be fine for that drawing. But if you had a different drawing with 1" = 2' and you copied an image from the first drawing into the 2nd drawing, it would be ginormous in relation to how it should look with proper scaling. Since MacDraw didn’t have scaling, an object didn’t have any concept of its own size, only relative size within each individual drawing. This is no different to how Adobe Illustrator works today. MacDraft, back in 1985, made scale drawings possible, CAD on a Mac a reality, and it’s still here today.
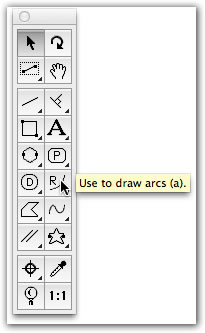
Probably the biggest change and enhancement for my own workflow with MacDraft 6.1 is that we can select the various tools by simply tapping on a key. This was not an issue 25 years ago; on a 9" screen, going back and forth from the drawing to the tool and back wasn’t all that big a deal. But when you start to have 20" to 30" screens, swinging back and forth starts to take its toll.
Now, with a simple, single key-press, you can have that tool ready to go. If there are subcategories of that tool, repeated pressing that key will bring up that version of the tool. Like all key command operations, it may take a while to remember what letter will bring up which tool, but the tools you use often will soon be committed to memory while those you seldom use may never be remembered.
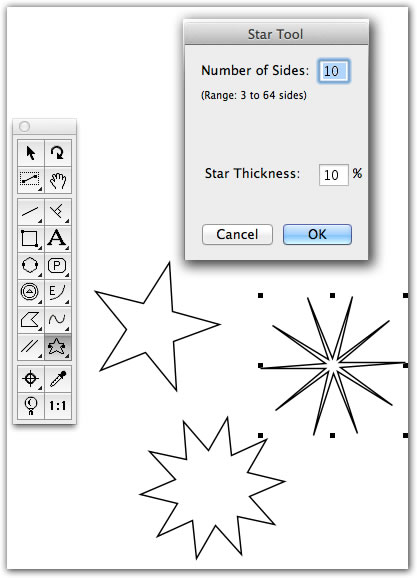
Note in the screenshot at right there is a new tool, the Star Objects tool (2nd column, 3rd from the bottom). This new tool lets you make multi-pointed objects, aka stars. Pressing the Option key and clicking on the tool brings up its control panel to set the number of sides and the star thickness. Unfortunately you cannot change the number of sides after you’ve placed a star, and—perhaps more disappointing—you cannot flatten the top and bottom of the points to make gears. Maybe a feature in progress? I hope so.
To make room for this new tool, the Rotate (90° CCW) tool was added to the options in the Toolbar across the top of the window that provides both CW and CCW rotation. A logical and big improvement. The Symbol Markers set was moved to take its place, (1st column, 2nd to last row) While MacDraft can be used from OX X v10.6 or greater, those using Mavericks will enjoy a speed boost provided by the new system. Completely new in MacDraft are Gradient Strokes and Gradient Fills. In addition, you can now create new Colors and new Patterns as opposed to being limited to only editing the current Color or Pattern palette. Ever since MacDraft came out with a color version, it has relied upon the same set of 68 colors and 10 grades of black to white. Now you can add your own colors and even gradient colors. All this is done from the Options menu.
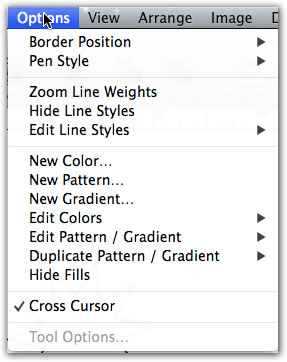
To create a new Gradient, after selecting the option you want from the menu above, the New Gradient panel pops up with a default white to gray gradient per-selected. At that point you can simply click on the little square of the starting or ending color and Apple’s “Colors” Panel will pop up where you can select the color. Click OK, and that color will be represented at that location. Clicking along that bottom strip will add more of these color marks. These color marks can be slid to where you want them or dragged off to remove.
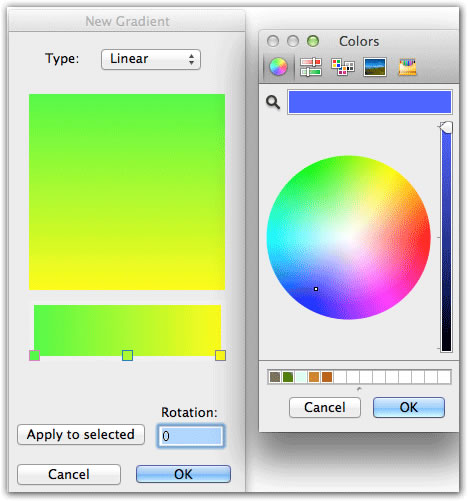
At this point, if you have an object selected and click “Apply to Selected,” it will receive that gradient. If you click OK, the window closes and that’s it even if you have an object selected.
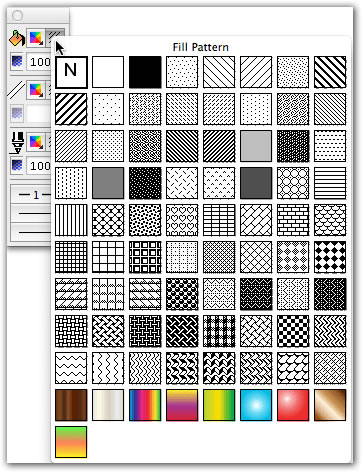
You can find the gradient, new color, or new pattern in the Pattern well as shown below. [Note that the Pattern well is significantly larger in size. The Color well has remained the same small size as before.] The default gradients are always there. This is the same Pattern well (for fills) as you’ll find in either the Parallel Line Tool or the Pen Tool, so any gradient you create is good for all.
There are a couple limitations of this feature:
- Any gradient will always point the same way. So, if you have a linear gradient (as opposed to a radial gradient) and place that into a rectangle, if you rotate the rectangle, the alignment of the gradient does not rotate as well. Even if you group the object, the gradient will always be aligned the way it was created. [Note: Perhaps this explains why there is a Duplicate option under Option menu with which you can duplicate a gradient and then rotate that gradient to fill the rotated object. Kind of a backwards way to solve a problem, but it does work.]
- Each gradient is contained within that document. To get a gradient, color fill, or pattern from one drawing to another, there is a non-intuitive process of copying an object with that fill, pasting it into the new drawing, and then either applying that attribute or selecting Attribute Options. This convoluted process is much more complicated than it should be and limits you to one item at a time.
Nonetheless, these are great strides for MacDraft and I do look forward to enhancements and developments on these features.
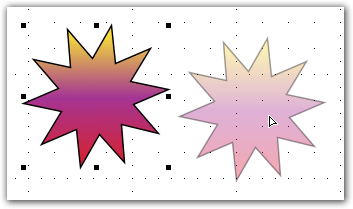
Now, when dragging an object, you can see what you are actually doing because the object becomes translucent and you can see what you have, and how it is occupying the screen and its relationship to the rest of the drawing. In the past, you only had the outline so your ability to visualize what you were dragging was limited. Besides being more functional, it simply looks better.
Lastly, under the Edit menu, there is now a new host of options for Duplicate that significantly increase productivity.

In short, this is a great update. It portends great directions for Microspot to build upon for future updates. The implementation of some of these features are certainly not perfect, but they are very welcome additions and show a strong promise of things to come.
![]()
Rating - 5 out of 5
Reviewed by: Gary Coyne
Appletell review
May 2014
